
 Why a post on video by a photographer? This year, I updated my video rig and workflow. Putting it all together was a struggle; while there are some helpful blog posts and articles online, I didn't find a good and complete HD to Blu Ray workflow (especially not using my collection of tools). I'm hoping my notes here might save a colleague from having to repeat my research.This year, we implemented some new technology into our production of The Studio's recital video. We started with the camera. The goal was to capture a quality of video that would lend itself to Blu Ray disc production. Being a photographer, I already have a collection of good quality EF-mount lenses on hand, so we capitalized on that by choosing the BlackMagic Cinema Camera from BlackMagic Design.I was extremely pleased with the video capture (29.97fps; Tungsten WB). The controls on the BlackMagic are easy to use, it has a great interface option with my MacBook, the dynamic range is impressive, and the included DaVinci software really helped the final product pop.The sound was captured via a Rode VideoMic. It was recommended by another photographer. I used a Tube MP Studio V3 preamp to boost the sound signal. I wish I had also plugged one of the camera's audio channels into the sound board to get a cleaner soundtrack signal that could later be mixed with ambient audio. I wound up mixing in the tracks manually in post-production, which was time-consuming (to say the least).What follows is the collection of random notes I took for each step of post-production. By no means is this a full tutorial on DaVinci, Premiere, or Encore; it's simply the notes I kept as I worked through the project so I'd be more streamlined next year. I hope it proves of some benefit to folks out there facing similar technical challenges.
Video workflow notes
DaVinci (adapted from the basic workflow in the user manual)
Create a new project and set your video resolution and frame rate to match your RAW video clips.Import your CinemaDNG RAW (or ProRes) clips into the Media Pool.Go to Project Settings/Image Scaling (gear in bottom-left) and set your Input Settings to Scale Entire Image to Fit.Go to Project Settings/Camera Raw and select CinemaDNG from the dropdown menu.
Select Decode Using to Project.Select the White Balance setting most suitable for your material.Set Color Space to BMD Film and likewise set Gamma to BMD Film.To apply the LUT, go to Project Settings/Look Up Tables, and set 3D Output Look Up Table to Blackmagic Cinema Camera Film to Rec709.This will apply the LUT to every shot in the timeline (even though nothing appears to happen).
Create new timeline in Edit - not empty - 00:00:00 (will automatically include clips).
Click on the Color tab and check the results. The images should exhibit improved color and contrast.
If color is oversaturated, effect was applied twice.
Click Deliver tab.
Mark in both clips (right-click).
Go to Output; choose Apple ProRes 422 (HQ) if that is not already the format.
Set Render Timeline As: to Individual Source Clips.Ensure Render Each Clip With a Unique Filename is deselected.Enable the Render Audio checkbox, select your audio channels and set to a bit depth of 24.
Enter File Name settings.
Under Render Job To: click Browse. Choose a new folder for your converted clips.
Be sure all clips are included in timeline so entire project renders.Click Add Job.Click Start Render.
Premiere
Make default video transition 30 frames (for title friendliness; 120 frames is general split)
Default audio transition 4 seconds; manually change scene transitions to 4 seconds/120 frames
Import clips in bottom-left window, then drag to timeline bottom-right
Click clip in bottom left and mark in and out in top left before dragging to timeline
/ shows all clips
Up/down arrows jump to beginning/end of clip (use when setting markers)
M to set marker (or To set an Encore Chapter Marker, choose Marker ]]> Set [Encore?] Chapter Marker)
R/L arrow keys move frame-by-frame
V for selection tool; C for cut tool
[Be sure audio waveform is visible - easier to find cut points]
Cut at point applause starts to diminish
Red arrow is trim tool (appears when you hover on timeline)
Move yellow marker to spot in clip, then drag trim tool to spot (jumps)
To close gaps, right-click in gap - ripple delete
Audio Transitions -> Crossfade -> Constant Power
Video Transitions -> Dissolve -> Cross Dissolve (create additional video track after track 1 for titles)
Right-click fx box to bring up yellow line
Fade in/out - Click Effect Controls tab in upper-left window
Expand timeline in upper-left window
Open Opacity (or Audio Level, etc.) and command-click on timelines to create multiple keyframes (cmd-click line)
Drag levels between keyframes
Once lines appear in main timeline, can set keyframes and drag in main timeline
If keyframe drags jump too much, use main timeline marker for more granular positioning
Cmd-T to add title
Titles go to Project tab - drag in as separate track
Cmd-D loads default transition
Effects for titles (e.g., cross dissolve) can be dragged to beginning and end of title tracks
Click in effect to bring up Effect Control in top left - drag to change duration
To bring up waveform for audio, drag to expand in timeline (left end)
Can take stills by using button under top-right monitor window or shift-E (use for DVD menu)
Zoom out on timeline to be sure entire video is marked in
[Be sure saved as ProRes or other high quality]
Export
Source Range: Entire Sequence
Format: H.264 Blu-ray
Output Name: [Be sure saving to correct media destination]
Queue button
Jumps to Adobe Media Encoder
[Reuse second audio track and transition/title video track for subsequent projects (duplicate original)]
Adobe Media Encoder
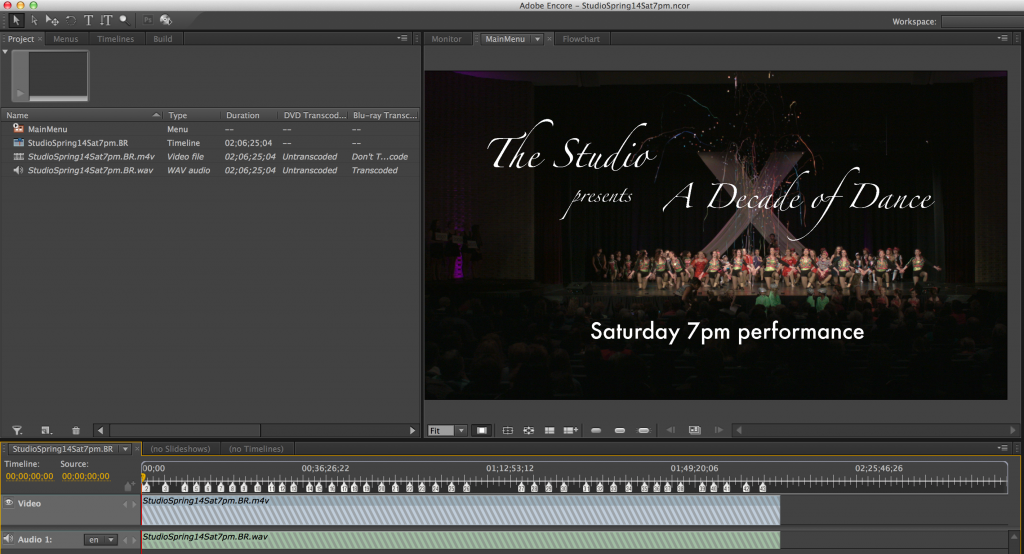
Encore
Create project
File -> Import as timeline (import video)
File -> Import as asset (import sound)
Drag missing audio or video to timeline
Right-click on timeline to bring in chapter markers (should come in automatically)
If necessary, add chapters by moving marker in timeline and clicking add chapter button (under video window)
Menu -> New menu
Click menu to edit in Photoshop
Be sure any text uses smooth anti-aliasing
Save - return to Encore
Right-click menu in Project tab list and set menu as first play
Motion tab - set title screen to last 10 seconds
Uncheck “Hold Forever”
Loop # - select None
Basic tab - End action and Override both direct to movie timeline
Drag swirl to asset in top left window
Click timeline in top left window and verify settings in Properties tab
Check Preview button in toolbar
For Disc title, click Build tab in top-left and name in top-right
Check aspect ratio
Click Build tab and check
Click Build button to create ISO (can burn in Disk Utility)
When making other version of disc (e.g., DVD from Blu Ray), right-click on video file in top-left and choose “replace asset” - will maintain chapter markers and links
Must do a save as; duplicating and renaming won’t work due to mapping to folder