
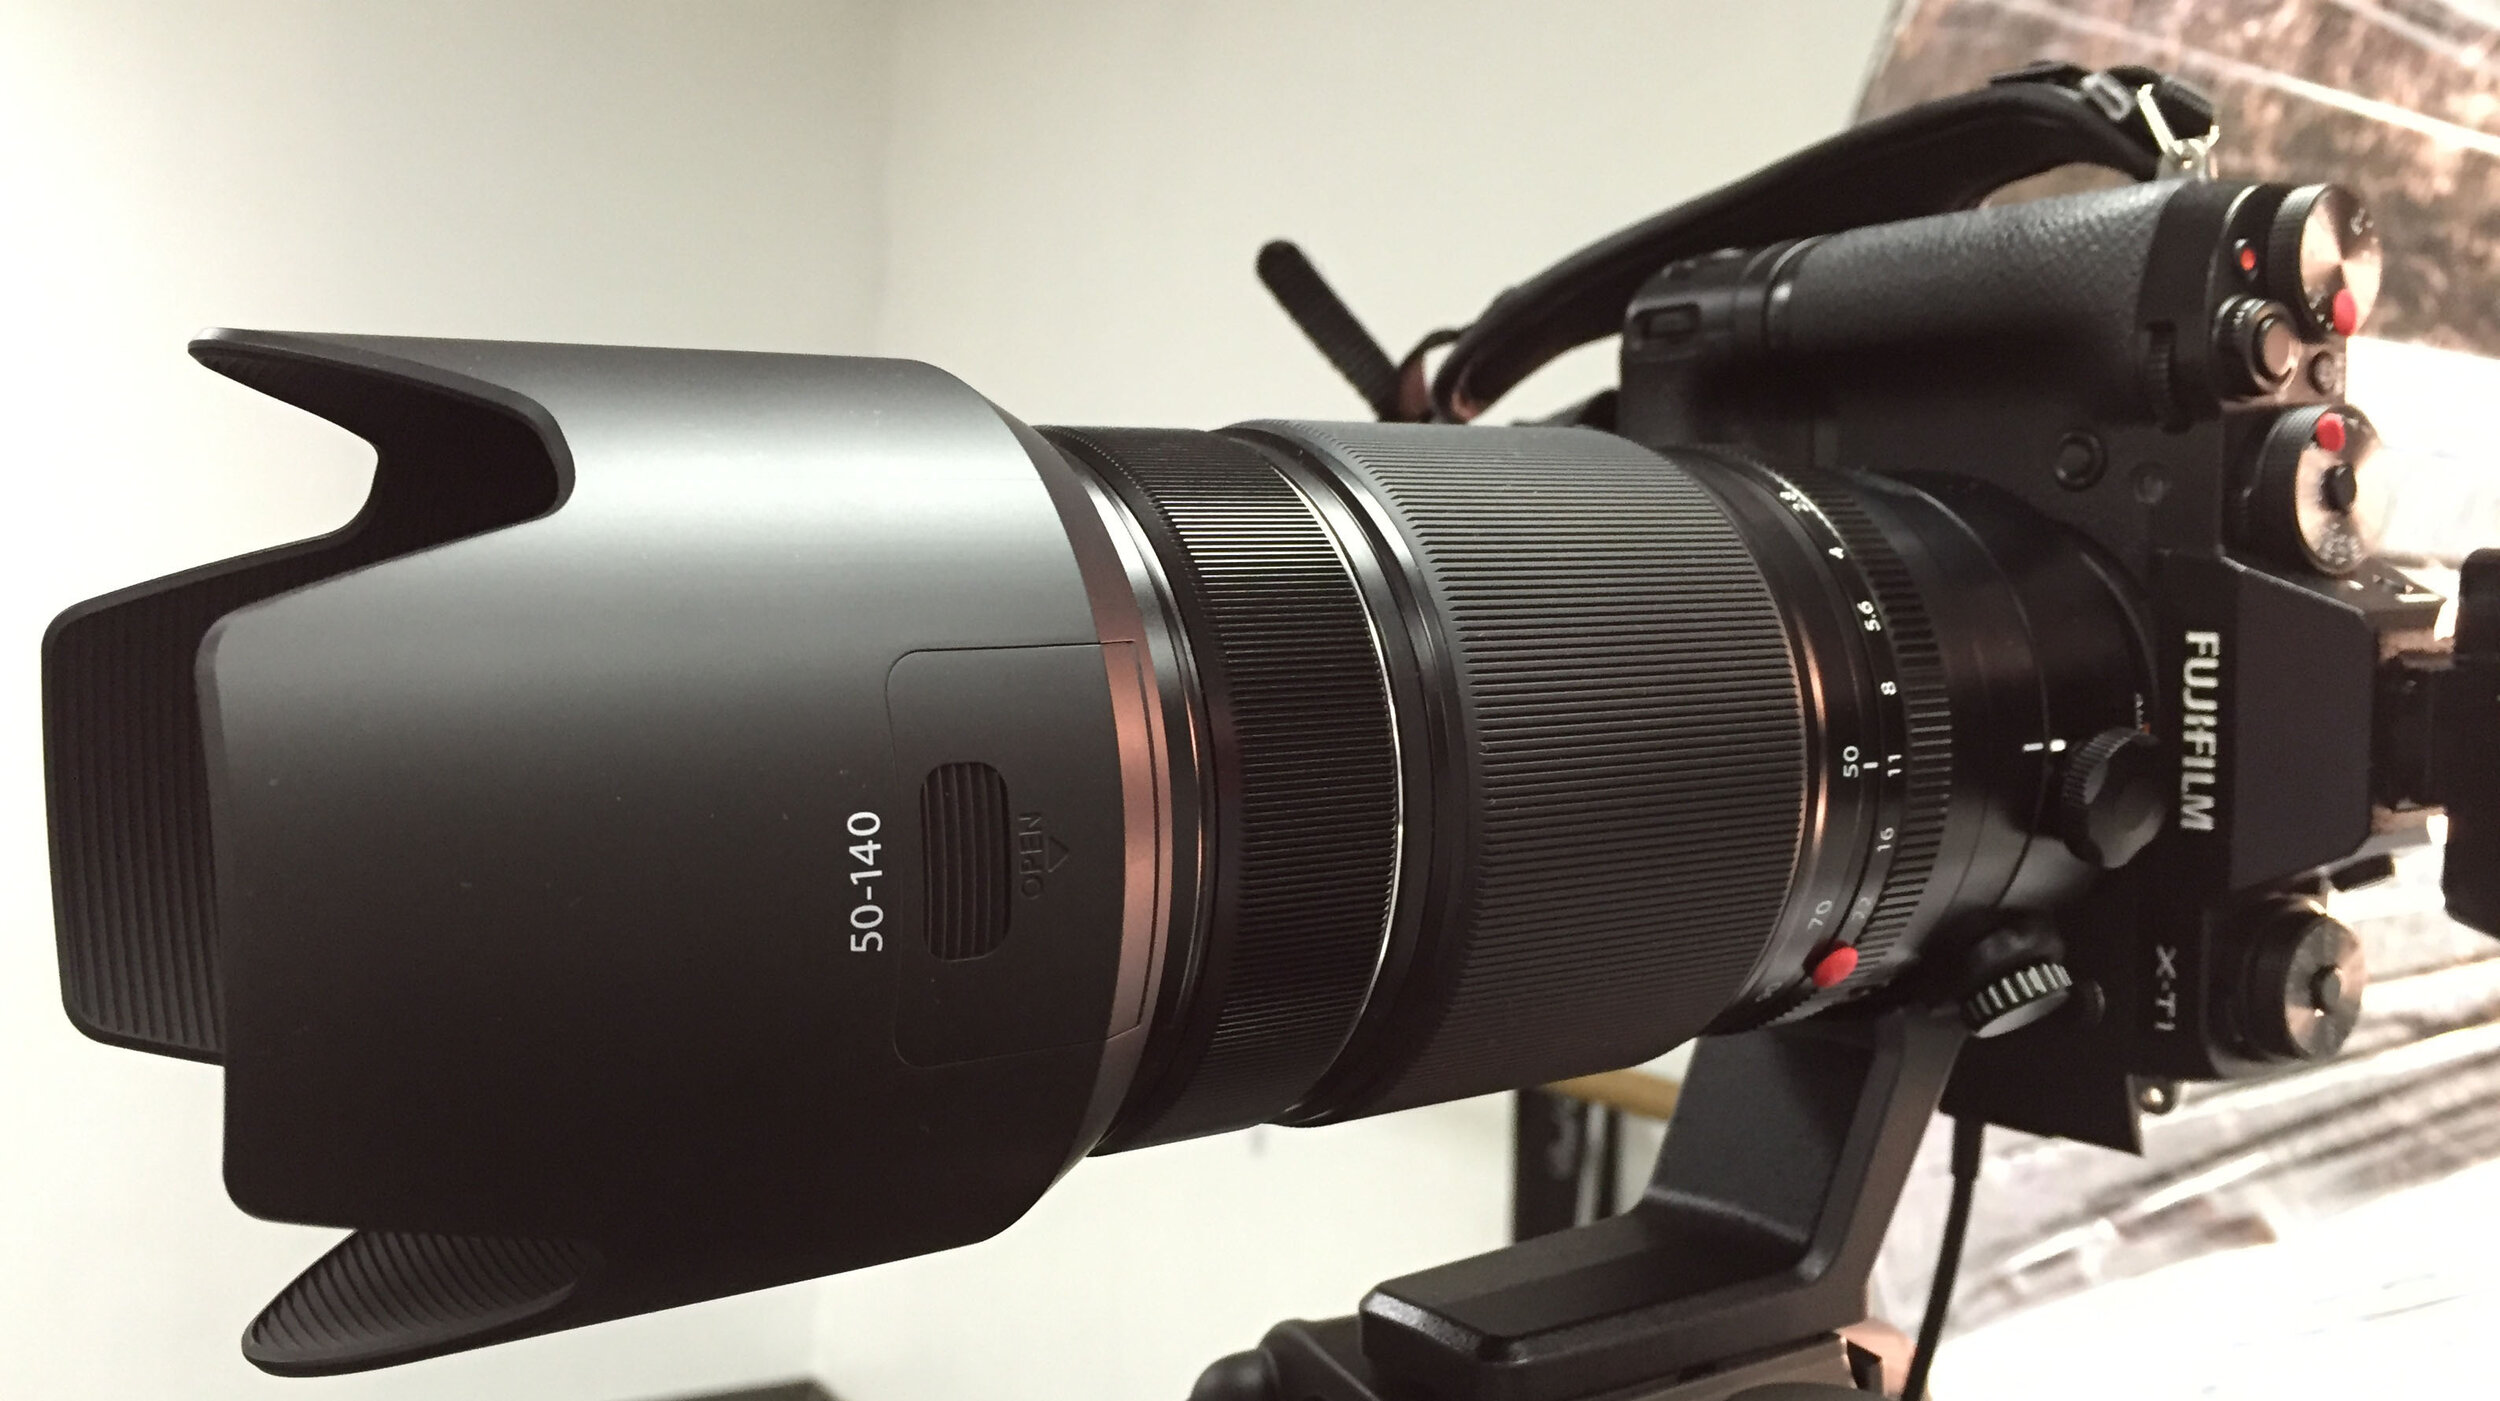
 A trend I've seen with some new photographers (especially pros), is to forego the use of a neck or hand strap. While nobody will accuse someone doing so of storing up treasures on earth, I suspect the motivation behind it is to exhibit a carefree attitude. Or maybe they don't like neck straps and don't know hand straps are available. Regardless, it's a questionable practice when you're handling a camera-lens combination that would cost over $2000 (and probably more) to replace.I'm a risk-averse person, but I still had a camera hit the floor a few years ago. I had (unwisely) hung it on a hook by its strap, so the lens was facing down. It came off the hook and fell a couple feet, and I heard glass break as it hit the ground. My heart sank, but when I looked at the lens I was relieved to find that the only damage incurred was a broken UV filter. The filter had taken the brunt of the impact, saving the lens.The same could be true of a lens hood, which could act as a "crumple zone" for a lens in the event a tripod toppled or some other unfortunate event occurred. So I always keep a lens hood on, even when shooting in the dark!
#saucermagnoliaproject at PCCA juried exhibition
One of the photos from my project on saucer magnolias was chosen for the first juried exhibition by the Perry County Council of the Arts. A 12x18 print of #saucermagnoliaproject239 (one of the first I've printed and framed myself) will be on display at the Landis House in Newport from October 9, 2015, to January 22, 2016.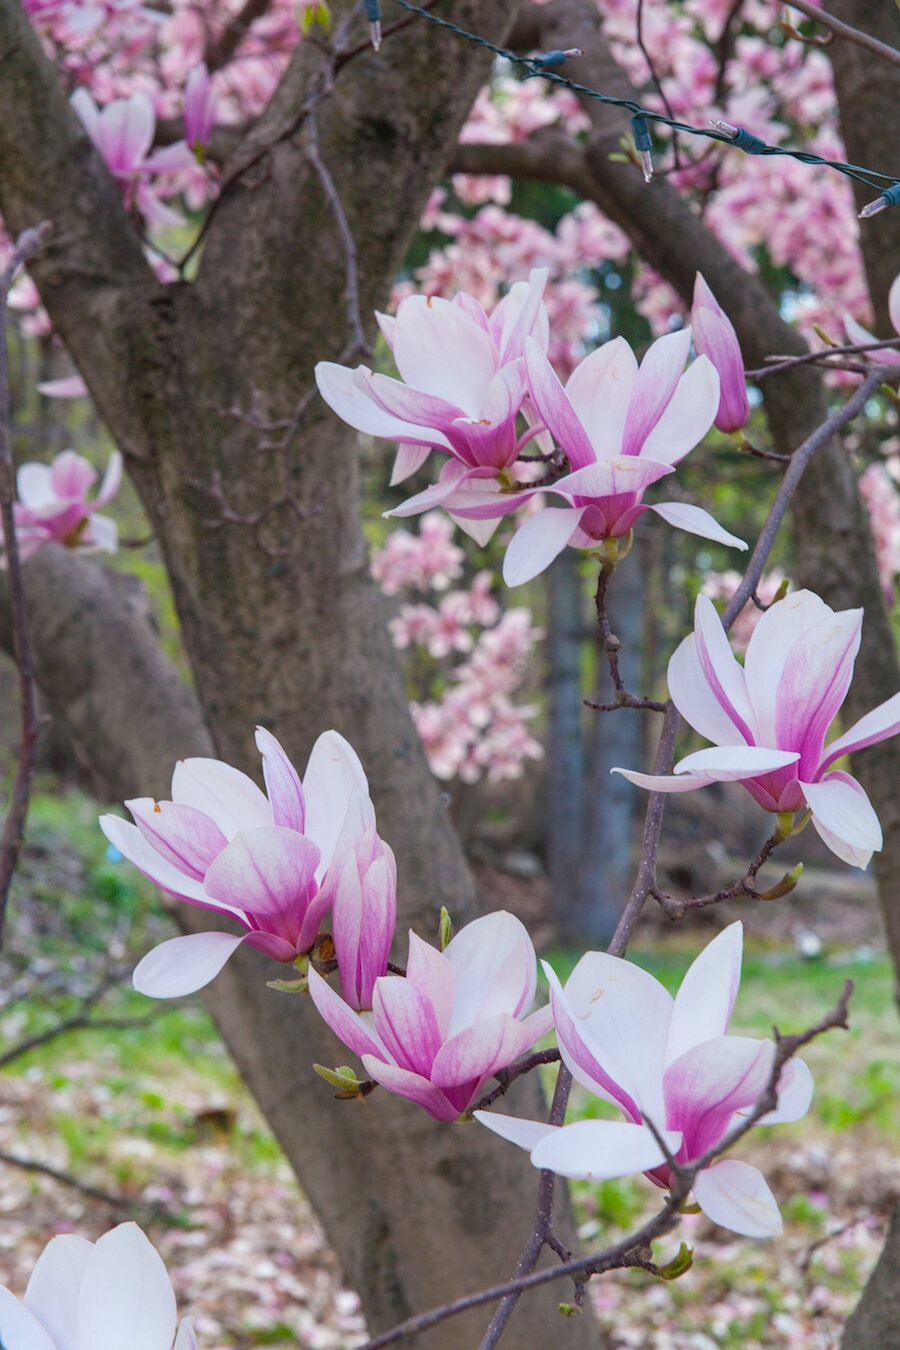
Looking for Studio performance photos?
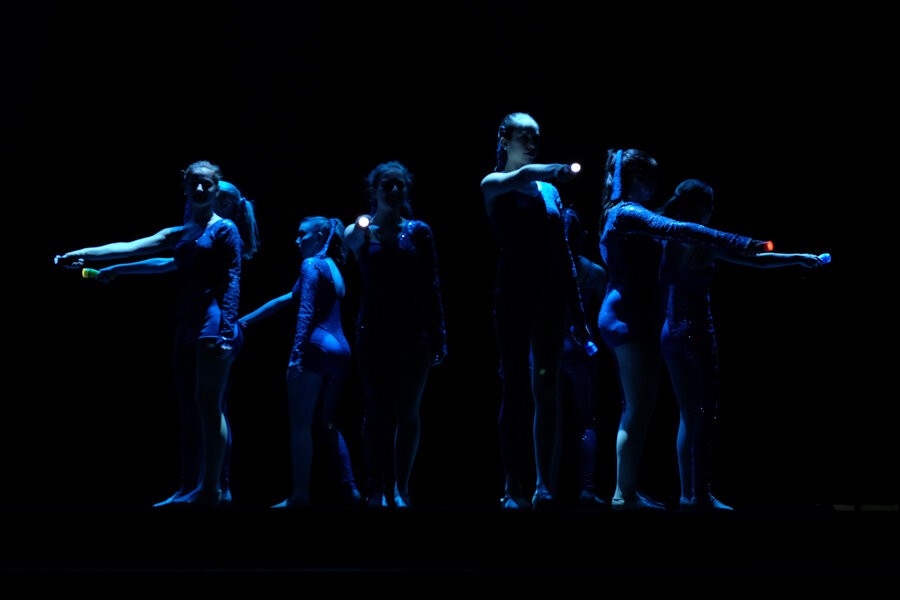 Photos from The Studio's spring performances are finally available in the usual place. Enjoy!
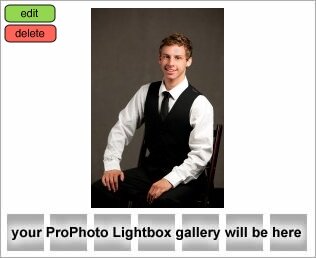
Gabby - East Pennsboro senior
Gabby is a long-time Studio dancer, and was a great senior to work with. These are just a few of the best portraits from her session.
Be careful who you dance with
 I learned when I purchased my first digital SLR that it's best to buy your camera from a reputable dealer. I saved a few dollars when I bought my Canon Rebel from one of those distributors who shaves a little bit off the price and includes some low-value extras (like a tiny tabletop tripod that wouldn't bear the weight of the camera), but they neglected to include the lens, which required follow-up (and some missed photo opportunities).Following that, my camera supplier of choice has been B&H. They are not the only great camera store, but I've always had good experiences with them. Their customer service is great, as is their section. If you are ever in NYC, take the opportunity to visit their Superstore.A few years later I forgot that lesson. I was eager to get my hands on the new Fujifilm X100 (for good reason!), and rather than wait for B&H to get it in stock, I purchased from an Amazon reseller called Big Value Inc. All seemed well until I needed to have the camera repaired. When I sent it to Fujifilm for repair, they informed me that it was not under warranty because I had been sold an overseas model of the camera (what's sometimes referred to as a "grey market" camera).Big Value referred to exchange the overseas model for a model intended to be sold in America. Amazon refused to help since I'd had the camera longer than their exchange period permitted. Luckily, I was able to get in contact with a member of the fraud team at American Express, and they backed me up and reversed the charge.I've purchased all of my cameras from B&H since then, and they recently helped me out in a big way. I was upgrading to a new SLR body, and there was a rebate being offered at the time. I'm not a fan of rebates, but it was worth over $100 and didn't require the purchase of anything I didn't want. I followed the submission guidelines to the letter and sent in the form. A few weeks later, I received a letter from Canon stating that my camera's serial number had already been used for that rebate and I was not eligible. I contacted B&H, they got in touch with Canon, and everything was soon straightened out.
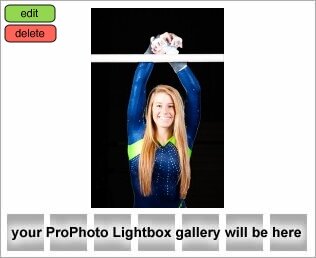
Erika - Susquenita senior
A few years ago, I had the pleasure of working with Erika's sister Megan, who was also a gymnast. Erika's specialty is the bars, which offered the opportunity to capture some different aspects of the gym. The chalk was her idea, and a good one.
 A few years ago, I had the pleasure of working with Erika's sister
 Josh - Cumberland Valley senior
Josh is a soccer player and snowboarder. He requested a selective color treatment for one of his snowboard photos, and I think it was a good choice.
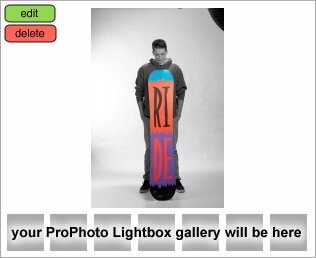 Josh is a soccer player and snowboarder. He requested a selective color treatment for one of his snowboard photos, and I think it was a good choice.
 Rachel - East Penn senior
Rachel is a Studio dancer and tennis player, and we incorporated both interests into her senior session. She brought a lot of ideas and enthusiasm to her session, and was great to work with.
 Rachel is a
 Another set gone
 Austin, a 2014 graduate, wanted to have some of his senior portraits in an urban setting. Luckily, we were able to capture this one just a few days before the work on the Mulberry Bridge in Harrisburg resulted in it being torn down.Here are a few others from his session:
The sun is setting on some great photo gear...
 From time to time, I have to part with some of my photo gear to make room for new items. Such is the case right now. I'm selling the SLR I've been using for the past few years, along with some great creative lenses (you've seen some of the photos taken with them in previous posts). If you're interested, you can check them out at the following links:Canon 5D Mk II digital SLRLensBaby Composer lensTamron 28-300mm zoom lensTamron 90mm f/2.8 1:1 macro lensSigma 50mm f/1.4 prime lensTokina 12-24mm f/4 wide angle zoom lens
Video workflow notes
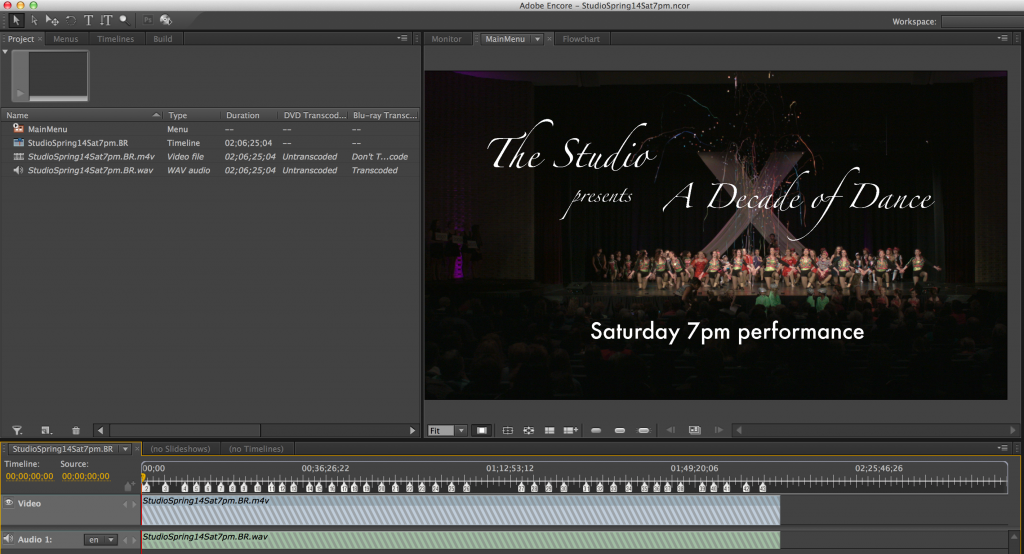 Why a post on video by a photographer? This year, I updated my video rig and workflow. Putting it all together was a struggle; while there are some helpful blog posts and articles online, I didn't find a good and complete HD to Blu Ray workflow (especially not using my collection of tools). I'm hoping my notes here might save a colleague from having to repeat my research.This year, we implemented some new technology into our production of The Studio's recital video. We started with the camera. The goal was to capture a quality of video that would lend itself to Blu Ray disc production. Being a photographer, I already have a collection of good quality EF-mount lenses on hand, so we capitalized on that by choosing the BlackMagic Cinema Camera from BlackMagic Design.I was extremely pleased with the video capture (29.97fps; Tungsten WB). The controls on the BlackMagic are easy to use, it has a great interface option with my MacBook, the dynamic range is impressive, and the included DaVinci software really helped the final product pop.The sound was captured via a Rode VideoMic. It was recommended by another photographer. I used a Tube MP Studio V3 preamp to boost the sound signal. I wish I had also plugged one of the camera's audio channels into the sound board to get a cleaner soundtrack signal that could later be mixed with ambient audio. I wound up mixing in the tracks manually in post-production, which was time-consuming (to say the least).What follows is the collection of random notes I took for each step of post-production. By no means is this a full tutorial on DaVinci, Premiere, or Encore; it's simply the notes I kept as I worked through the project so I'd be more streamlined next year. I hope it proves of some benefit to folks out there facing similar technical challenges.
DaVinci (adapted from the basic workflow in the user manual)
Create a new project and set your video resolution and frame rate to match your RAW video clips.Import your CinemaDNG RAW (or ProRes) clips into the Media Pool.Go to Project Settings/Image Scaling (gear in bottom-left) and set your Input Settings to Scale Entire Image to Fit.Go to Project Settings/Camera Raw and select CinemaDNG from the dropdown menu.
Select Decode Using to Project.Select the White Balance setting most suitable for your material.Set Color Space to BMD Film and likewise set Gamma to BMD Film.To apply the LUT, go to Project Settings/Look Up Tables, and set 3D Output Look Up Table to Blackmagic Cinema Camera Film to Rec709.This will apply the LUT to every shot in the timeline (even though nothing appears to happen).
Create new timeline in Edit - not empty - 00:00:00 (will automatically include clips).
Click on the Color tab and check the results. The images should exhibit improved color and contrast.
If color is oversaturated, effect was applied twice.
Click Deliver tab.
Mark in both clips (right-click).
Go to Output; choose Apple ProRes 422 (HQ) if that is not already the format.
Set Render Timeline As: to Individual Source Clips.Ensure Render Each Clip With a Unique Filename is deselected.Enable the Render Audio checkbox, select your audio channels and set to a bit depth of 24.
Enter File Name settings.
Under Render Job To: click Browse. Choose a new folder for your converted clips.
Be sure all clips are included in timeline so entire project renders.Click Add Job.Click Start Render.
Premiere
Make default video transition 30 frames (for title friendliness; 120 frames is general split)
Default audio transition 4 seconds; manually change scene transitions to 4 seconds/120 frames
Import clips in bottom-left window, then drag to timeline bottom-right
Click clip in bottom left and mark in and out in top left before dragging to timeline
/ shows all clips
Up/down arrows jump to beginning/end of clip (use when setting markers)
M to set marker (or To set an Encore Chapter Marker, choose Marker ]]> Set [Encore?] Chapter Marker)
R/L arrow keys move frame-by-frame
V for selection tool; C for cut tool
[Be sure audio waveform is visible - easier to find cut points]
Cut at point applause starts to diminish
Red arrow is trim tool (appears when you hover on timeline)
Move yellow marker to spot in clip, then drag trim tool to spot (jumps)
To close gaps, right-click in gap - ripple delete
Audio Transitions -> Crossfade -> Constant Power
Video Transitions -> Dissolve -> Cross Dissolve (create additional video track after track 1 for titles)
Right-click fx box to bring up yellow line
Fade in/out - Click Effect Controls tab in upper-left window
Expand timeline in upper-left window
Open Opacity (or Audio Level, etc.) and command-click on timelines to create multiple keyframes (cmd-click line)
Drag levels between keyframes
Once lines appear in main timeline, can set keyframes and drag in main timeline
If keyframe drags jump too much, use main timeline marker for more granular positioning
Cmd-T to add title
Titles go to Project tab - drag in as separate track
Cmd-D loads default transition
Effects for titles (e.g., cross dissolve) can be dragged to beginning and end of title tracks
Click in effect to bring up Effect Control in top left - drag to change duration
To bring up waveform for audio, drag to expand in timeline (left end)
Can take stills by using button under top-right monitor window or shift-E (use for DVD menu)
Zoom out on timeline to be sure entire video is marked in
[Be sure saved as ProRes or other high quality]
Export
Source Range: Entire Sequence
Format: H.264 Blu-ray
Output Name: [Be sure saving to correct media destination]
Queue button
Jumps to Adobe Media Encoder
[Reuse second audio track and transition/title video track for subsequent projects (duplicate original)]
Adobe Media Encoder
Encore
Create project
File -> Import as timeline (import video)
File -> Import as asset (import sound)
Drag missing audio or video to timeline
Right-click on timeline to bring in chapter markers (should come in automatically)
If necessary, add chapters by moving marker in timeline and clicking add chapter button (under video window)
Menu -> New menu
Click menu to edit in Photoshop
Be sure any text uses smooth anti-aliasing
Save - return to Encore
Right-click menu in Project tab list and set menu as first play
Motion tab - set title screen to last 10 seconds
Uncheck “Hold Forever”
Loop # - select None
Basic tab - End action and Override both direct to movie timeline
Drag swirl to asset in top left window
Click timeline in top left window and verify settings in Properties tab
Check Preview button in toolbar
For Disc title, click Build tab in top-left and name in top-right
Check aspect ratio
Click Build tab and check
Click Build button to create ISO (can burn in Disk Utility)
When making other version of disc (e.g., DVD from Blu Ray), right-click on video file in top-left and choose “replace asset” - will maintain chapter markers and links
Must do a save as; duplicating and renaming won’t work due to mapping to folder
#saucermagnoliaproject - the whole picture
(Pardon the pun.) You can see the entire collection of photos in the Saucer Magnolia Project gallery.It's been a long time since I've taken on such a large photo project (that didn't involve portraits). It was a great opportunity to involve several of the tools I have at my disposal:
Sometimes using such applications feels or appears forced, but in this case each offered a different perspective on the subject. I hope you enjoyed it.
#saucermagnoliaproject - painting
Sometimes I like to run a photo through Corel's Painter application to see the effect. For this photo, I thought an Impressionist painting treatment would look good. I like the results, and I hope to order a print of this one soon.

#saucermagnoliaproject - the camera you have with you
Chase Jarvis famously defined the best camera as the one you have with you. That definition proved true for me the morning after I took most of the photos in this series of posts. After parking for church, I discovered a saucer magnolia that I had not noticed before. Having no other camera with me, I snapped some photos with my iPhone.The advantages of smartphone photography are attractive. You almost always have a good-quality camera with you, and the editing and sharing tools are built in! The combination I use is Camera Awesome for photographing, Snapseed for editing, and Instagram for sharing.
#saucermagnoliaproject - High Dynamic Range
High Dynamic Range pictures are combinations of frames taken at different exposure settings. Software is used to choose the portions of each exposure that provide the most detail. I use my camera's bracketing option to take the three frames (one at standard exposure, one at two f-stops below that, and one at two f-stops above the first). Then I use Photomatix Pro to combine the frames and yield the final result.

#saucermagnoliaproject - LensBaby
The LensBaby is a lens that requires manual focus and manual manipulation of its angle and aperture. You place a disk into the lens to determines the f-stop (aperture), angle the lens to determine the focus point, and then focus using the focus ring. This creates a nice bokeh effect in the image, with much of the frame out of focus, so the viewer naturally gravitates to the subject.Some would argue that the same effect can be gained using software, but the LensBaby is fun and has its place.
#saucermagnoliaproject - macro lens work
I wrote a few years ago about shooting close up with a macro lens. I used the same lens to capture some detail on the saucer magnolias and their bloom petals.We planted a saucer magnolia ourselves this year. One of the blooms appears in this gallery. Sadly, the tree did not survive the summer.
 We planted a saucer magnolia ourselves this year. One of the blooms appears in this gallery. Sadly, the tree did not survive the summer.
#saucermagnoliaproject - wide angle
One of the lenses I used for the #saucermagnoliaproject was a wide angle, which I needed to capture the entirety of the saucer magnolia in Prairie Heights Cemetery. The Tokina 12-24mm wide angle zoom lens is no longer available, but there are alternatives.Wide angle lenses offer a unique perspective, and every mm counts when you're working below 16. They're especially handy when you're in the city and can't put much distance between you and the buildings you're shooting.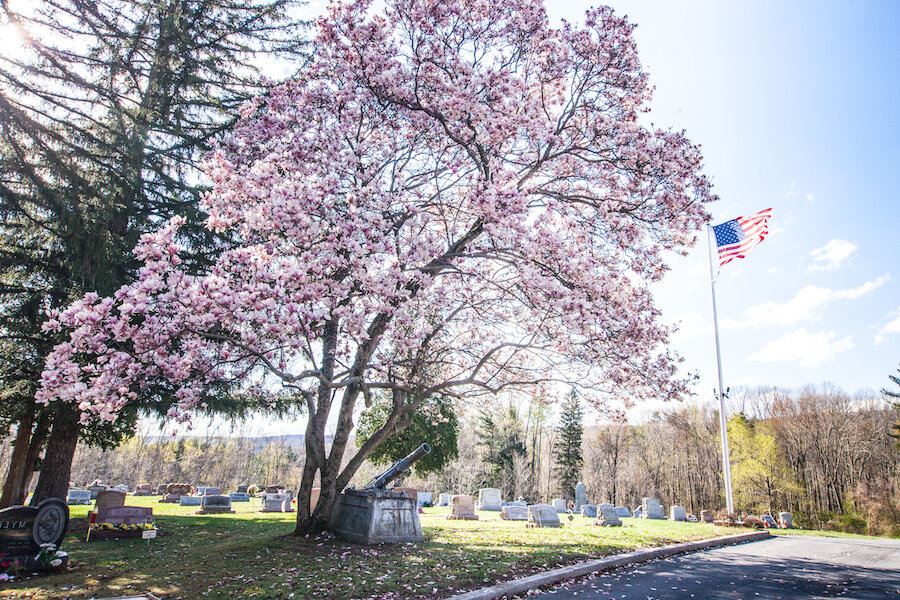
#saucermagnoliaproject - perspective

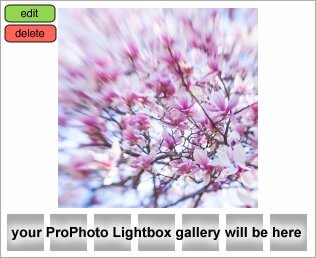
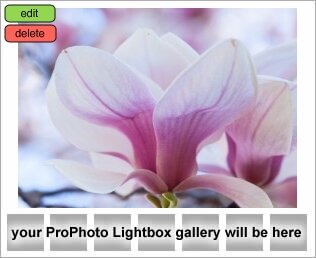
Ever since I moved to Pennsylvania, I've been enamored with the saucer magnolia trees (Latin name Magnolia x soulangiana) that blossom each April. This year, I indulged my love of those trees and photography and created what I call the Saucer Magnolia Project.I located several saucer magnolia trees in the tri-county area (Perry - Cumberland - Dauphin) where I reside, and kept an eye on some particularly interesting ones so I could catch their blossoms when they peaked.When those days came, I set out with a full arsenal of tools (Canon 5D, tripod, and several lenses) to capture them from different perspectives. This encouraged me to become familiar with the trees from a variety of angles, and to capture them in a way that allows the viewer to come away with an appreciation and familiarity of the subject that a single lens might not allow.In this series of posts, I'll share photos taken with a few different lenses and techniques. I'll begin with some taken with a Sigma 28-70mm zoom lens.

Studio DVDs are ready!
 You'll be able to pick up DVDs from The Studio's spring performance beginning tomorrow (July 14). For the first time, we're offering the discs in Blu-Ray format. The price is the same as for a normal DVD, with the added advantages of being in high definition and having a more durable finish. Even if you already ordered a standard DVD, you can switch it for a Blu Ray if you'd like.Thank you for your support. I hope you enjoy watching!